
Backup OPNsense to Nextcloud
Table of Contents
What is OPNsense?
OPNsense® is an open source, easy-to-use and easy-to-build FreeBSD based firewall and routing platform.
OPNsense includes most of the features available in expensive commercial firewalls, and more in many cases. It brings the rich feature set of commercial offerings with the benefits of open and verifiable sources.
Why OPNsense?
The feature set of OPNsense includes high-end features such as forward caching proxy, traffic shaping, intrusion detection and easy OpenVPN client setup. The latest release is based on a recent FreeBSD for long-term support and uses a newly developed MVC-framework based on Phalcon. OPNsense’s focus on security brings unique features such as the option to use LibreSSL instead of OpenSSL (selectable in the GUI).
The robust and reliable update mechanism gives OPNsense the ability to provide important security updates in a timely fashion.
Backup your OPNsense configuration to your Nextcloud
In OPNsense you can backup your configuration directly and automatically to Nextcloud, using the backup feature. Every backup will be encrypted with the same algorithm used in the manual backup so it’s quite easy to restore to a new installed machine.
After set-up, the backup feature will run a first backup of the OPNsense configuration file. Then, if the configuration is subsequently changed, a new backup will be run. Only one backup is run per day after configuration changes.
1. Create a new user
Click on the user icon top right and click “Users”. In the new page, enter an username and a password into the boxes and click create to create a new user.
2. Create an Access Token
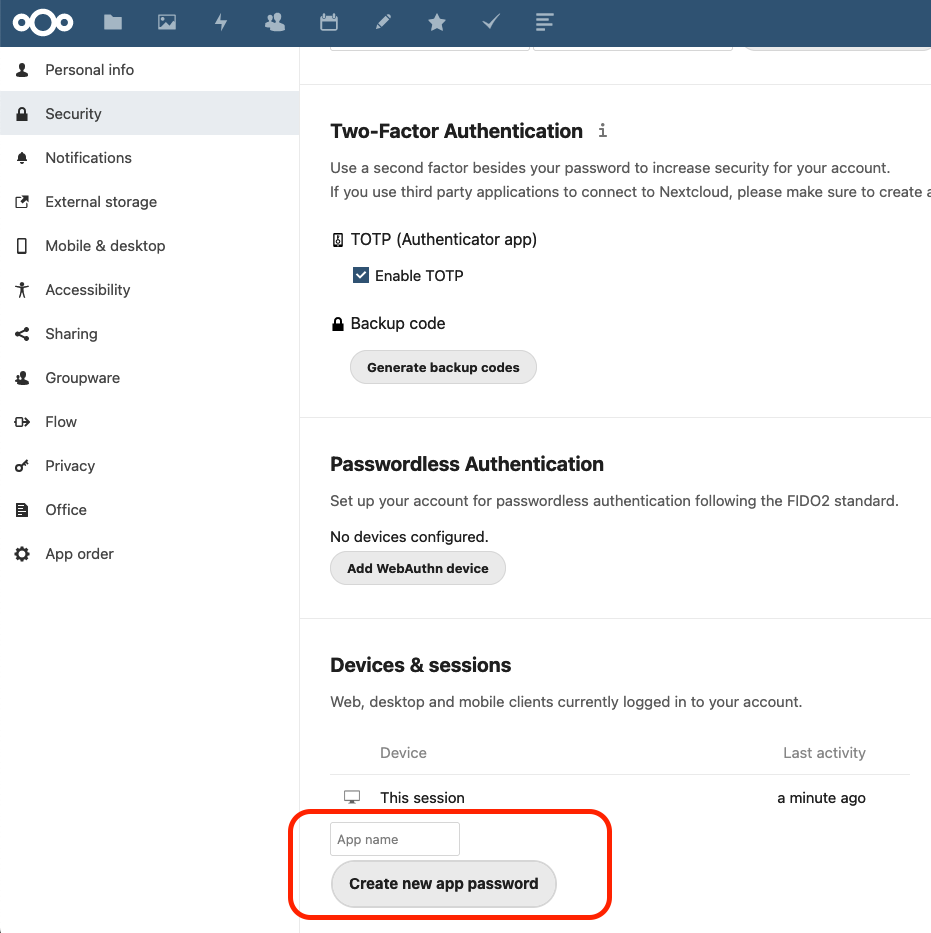
Copy and store the generated password.
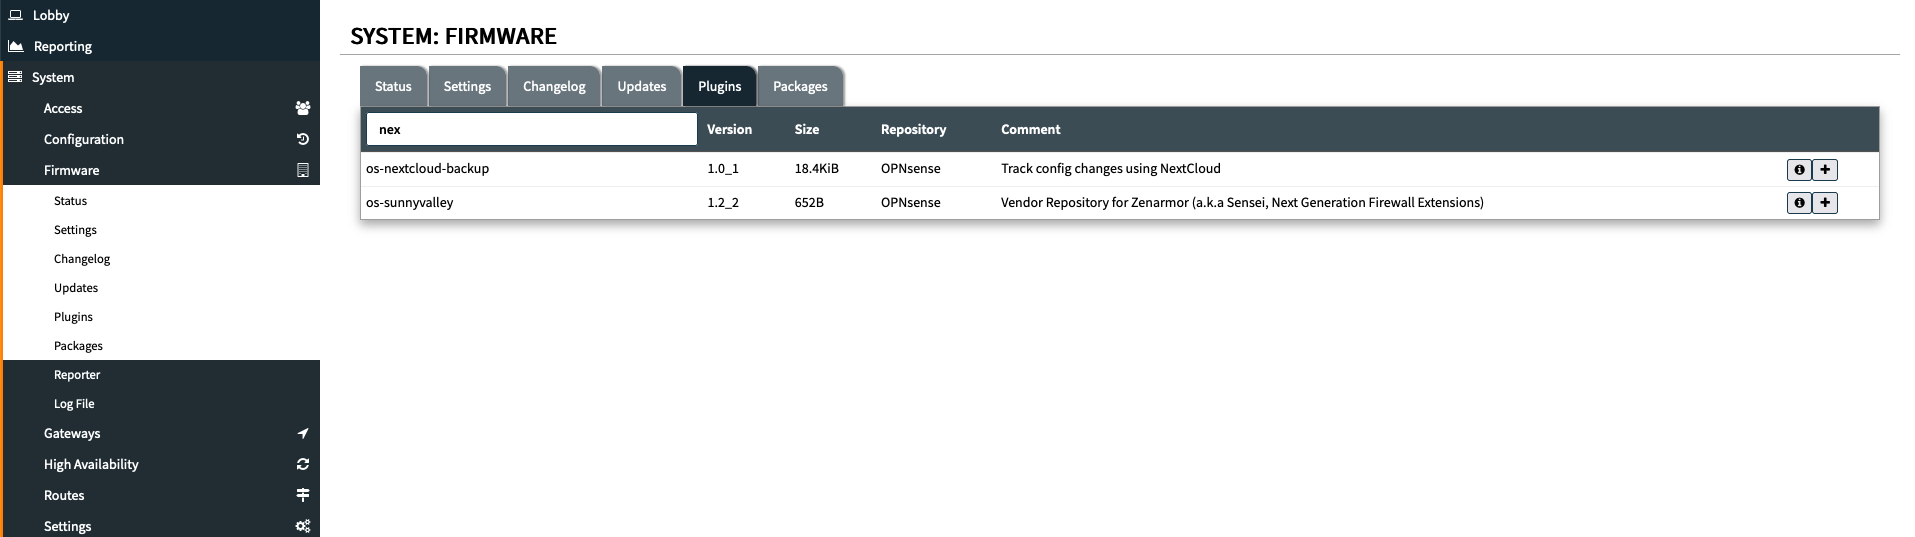
3. Install Nextcloud Backup Plugin
Go to and install the os-nextcloud-backup plugin
4. Connect OPNsense with Nextcloud

Scroll to the Nextcloud Section in and enter the following values:
Enable | checked |
URL | Base URL of your Nextcloud installation like https://cloud.example.com |
User | your choosen username |
Password | paste your app password from step 2 |
Encryption Passowrd | define a Password to encrypt the config file |
Backup Directory | a name consisting of alphanumeric characters (keep default) |

